Protection Setup
Last updated: 2026-03-15
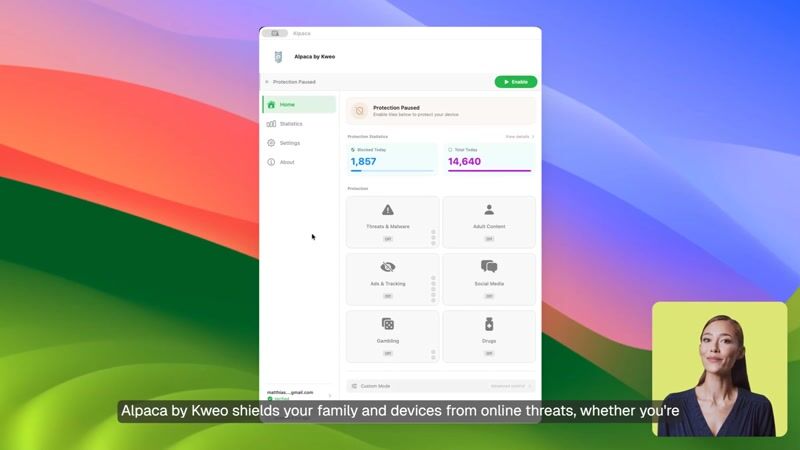
Alpaca uses DNS-based filtering to help protect your device from common internet-based threats such as malware, phishing, tracking, and inappropriate content. This guide walks you through configuring protection categories, adjusting strength levels, and enabling protection.
Video Walkthrough
Setting Up Protection
Choose Protection Categories
Open the Alpaca app and navigate to the Protection tab. You'll see a list of categories you can filter — such as Malware & Phishing, Ads & Trackers, and Adult Content. Toggle on the categories you want Alpaca to help protect against.
Set Strength Levels
Each category has a strength slider that controls how aggressively Alpaca filters content. A higher strength level uses more filter lists and may block more domains, while a lower level is less restrictive. Adjust these based on your family's needs.
Enable Protection
Once you've configured your categories and strength levels, click Enable Protection. Alpaca activates its DNS filter across your device — filtering begins immediately.
If you need to temporarily disable protection, you can do so from the menu bar. Your category and strength settings are preserved when you toggle protection off and on again.