Approving the Network Extensions
Last updated: 2026-03-15
Why Does Alpaca Need Network Extensions?
Alpaca uses two macOS Network Extensions to help filter DNS requests across your entire Mac:
- DNS Proxy — routes DNS queries through Alpaca so it can apply your filter lists
- Content Filter — helps identify and filter network connections to blocked domains
This is the same technology used by enterprise security tools and VPNs. macOS requires your explicit approval before any app can use these capabilities.
This is a one-time setup step. Once approved, you won't need to do this again unless you reinstall Alpaca.
Video Walkthrough
Watch the extension approval process step by step. You can pause at any point and follow along.
Approving the Extensions
Enable the DNS Proxy Extension
After installation, Alpaca will prompt you to enable the DNS Proxy extension.

A macOS system dialog will appear asking to allow Alpaca's network extension. Important: do not click the blue OK button — this only dismisses the dialog without enabling anything. Instead, click Open System Settings.

In System Settings, locate the Alpaca DNS Proxy entry and toggle the switch to enable it.

Enter your Mac password when prompted to authorize the change.

Enable the Content Filter Extension
Alpaca will now prompt you to enable the Content Filter extension — the second of two required extensions.

Again, a macOS system dialog will appear. Just like before, click Open System Settings instead of the blue OK button.

In System Settings, find the Alpaca Content Filter entry and toggle the switch to enable it.

Enter your password once more to authorize.

Enable DNS Filtering
With both extensions approved, Alpaca will show one final screen to enable DNS filtering.

Alpaca will briefly check that everything is configured correctly.

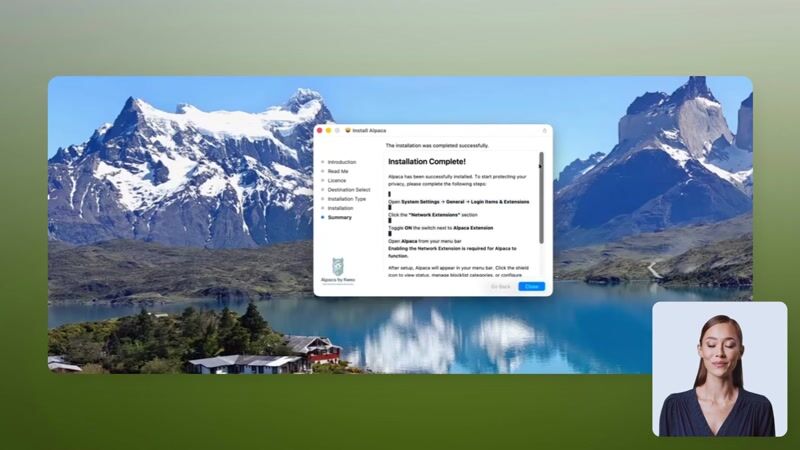
If you accidentally clicked the blue OK button instead of Open System Settings, you can find the extensions manually. Go to System Settings → General → Login Items & Extensions → Network Extensions and enable both Alpaca entries from there.
Verifying the Extensions
After completing setup, the Alpaca icon should appear in your menu bar, indicating that protection is active. You can verify both extensions are enabled in System Settings → General → Login Items & Extensions → Network Extensions — you should see two Alpaca entries, both toggled on.
If the extensions don't appear in System Settings, try restarting your Mac and launching Alpaca again.